How to Make a Raised Bed for Gardening
Building a Raised Flower Bed for Gardening has become one of the most popular ways to grow vegetables, flowers and even shrubs. They are an excellent option for anyone looking to improve soil control and drainage.
There are many pros to having a raised flower bed, as they are incredibly easy to maintain year-round, extending the growing season. By raising the planting bed, they make gardening easier for everyone by reducing the need to kneel or bend, ensuring that gardening can be an inclusive experience for everyone.
Whether you are working with a small or large garden, or a patio, learning how to build a raised flower bed for gardening can be one of the most beneficial ways to expand your gardening knowledge and experience and create a healthier, more productive garden.
Why Should I Grow My Plants In A Raised Bed?
Before diving straight into your new project, it is essential to discuss why Raised Beds are so beneficial for your gardening experience, so you can begin planning your perfect bed.
- Improved Soil Control: One of the most critical parts of raised gardening beds is the ability to control your soil. Filling your beds with custom soil mixes tailored to each plant's needs is especially helpful if your soil is contaminated. Nutrient-rich topsoil is ideal for allowing roots to grow and spread easily, helping your plants thrive.
- Improved Drainage: Raised Beds can help drain excess water more efficiently, reducing the likelihood of root rot and waterlogging.
- Improved Health for Your Back and Knees: When your beds are raised above ground level, you need less bending or kneeling, making gardening much more comfortable. They are perfect for anyone looking for a more accessible gardening experience and will help reduce strain.
- Better Pest Control: Elevated beds are the perfect way to reduce problems from slugs, snails, insects and rabbits. To better control your beds, you may choose to use additional barriers, such as Insect Netting, to help prevent disruption.
- Flexible Locations: Raised beds can be placed over poor-quality soil, on top of patios, gravel, or hard surfaces, making them a flexible choice for any size, shape or style of gardening area.
What Should I Consider When Building A Raised Bed For Gardening?
When building your Raised Bed, consider these factors to ensure your beds are perfect for you.
- Size: One large bed can often be an inconvenience to manage - try to opt for a few smaller beds instead, so that you can easily tend to them. Widths of less than 1.5m are the most popular for ease of use.
- Orientation: Most plants, vegetables and flowers thrive in direct sunlight. Try to position your plants away from shaded areas of your garden for even sunlight.
- Pathways: Pathways are an essential factor to remember, especially if you will be using wheelbarrows or need to use a wheelchair. For wheelbarrows, aim for 18in between your beds; for wheelchair users, aim for at least 1m.
What Tools Will I Need To Make A Raised Bed?
One of the main advantages of creating your own raised bed from scratch is that you can choose your materials based on your own budget.
Using Durable Timber, such as softwood sleepers or reclaimed hardwood, is the ideal choice for your frame, as it is very versatile. Leaving the timber untreated is an optional step often used by organic farmers, as it keeps the bed free from chemical preservatives.
- Spirit Level
- Saw
- Screws
- Power Drill
- Shovel or Spade
- Rake
- Wheelbarrow (Optional)
- Compost and Topsoil Mix
How Do I Build A Raised Bed For Gardening?
Step One: Location
To have success growing a healthy garden, you must ensure that your plants receive the nutrients they need. For example, most plants, vegetables and flowers will require direct sunlight, so placing your raised bed in a shaded area will not be beneficial.
Try to choose an area which gets at least 6-8 hours of sunlight a day, away from any trees which may cause unnecessary shading. Ensure that your beds are placed in an area which is easily accessible for regular watering and maintenance, and that they are placed on level ground for stability.
Step Two: Size
When building your raised bed, specific dimensions ensure it has enough room to grow comfortably and thrive.
- Width: Widths of less than 1.5m are ideal, as they ensure accessibility and allow you to tend your garden from any direction.
- Length: The length of your bed can vary depending on the space you have available. Many tend to stick to 1.5m to 2m for beds to ensure they are easily accessible.
- Height: The most common height for a raised bed is 16-24in to accommodate the root depth of most plants.
Step Three: Build Your Frame
Though this may seem daunting to some, the actual building process of your frame is relatively easy and can be accomplished with ease.
- Cut your timber to your designated size measurements. If needed, many DIY stores will help you with this process.
- Lay your boards out in a rectangular shape, and attach the corners using at least three screws per corner.
- If needed for extra stability, attach stakes to the middle of the frames to help the beds avoid bending when filled with soil.
- Check your frames are level using a spirit level to ensure there is no uneven water pooling.
Step Four: Prepare Your Ground
Ensuring you spend time preparing your ground will help prevent weeds in your beds and encourage proper drainage.
If you are building your bed on grass or soil, remove any existing grass where possible to help reduce the risk of weeds reappearing. Use a rake or gardening fork to loosen the ground and prepare for even water drainage. To go the extra mile, you could lay Weed Control Fabric to help prevent unwanted weeds.
If you are building on a hard surface, such as a patio, try using Ground Cover or consider adding Gravel to improve drainage.
Step Five: Position Your Frame
Once your frame is built and ready to be used, place it in your chosen location, with assistance as needed. Use this as an opportunity to double-check that everything is level and the frame sits flat. If your area is on a slope, try using stakes to help keep it secure. Ensuring that your frame is stable will help the longevity and encourage the soil to settle properly.
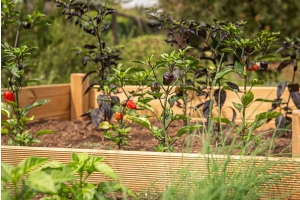
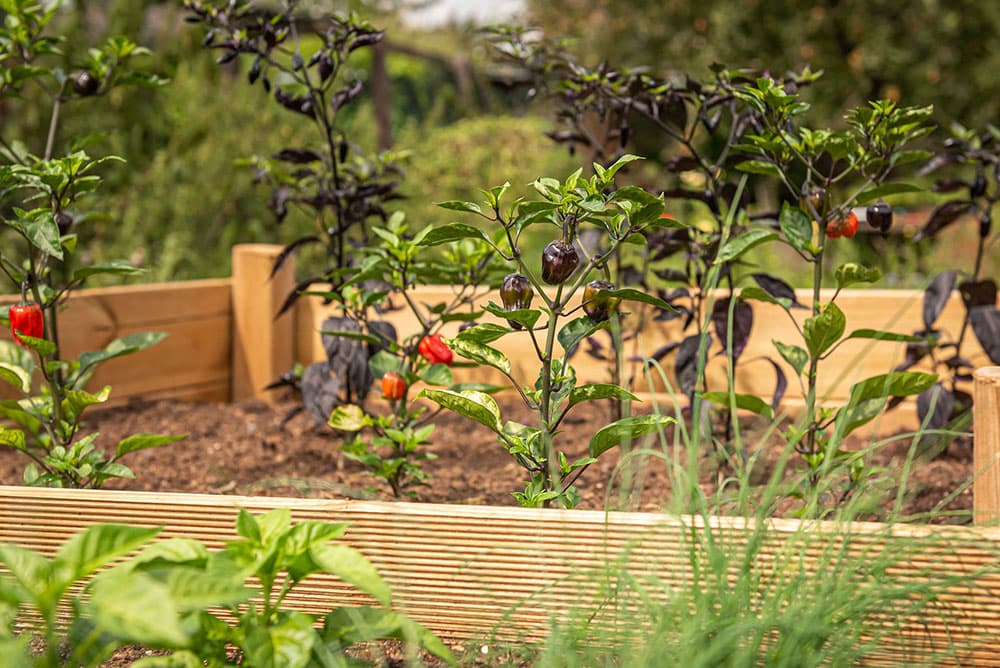
Step Six: Fill Your Frame With Soil and Begin Planting
Start by filling your frame with your Compost Mix. One of the main advantages of having a raised bed is that you have complete control over the quality of your soil.
A popular mixture consists of 50% Topsoil and 50% Compost for a simple, cost-effective solution that provides the necessary nutrients and healthy drainage.
When filling your bed with soil, try to fill it as close to the top as you can, leaving about an inch at the top to prevent it from spilling over when watering.
Now you are ready to begin your planting journey! A selection of great options for raised beds includes:
- Vegetables: Such as Lettuce, Tomatoes, Peppers, Carrots, etc.
- Herbs: Such as Basil, Parsley, Thyme, Mint, etc.
- Flowers: Such as Lavender, Marigolds, Daisies, etc.
Once planted successfully, thoroughly water your plants or seeds to help settle the soil. Adding Mulch around your plants will also help to protect the soil, retain moisture and keep weeds at bay.
Final Tips For A Successful Raised Gardening Bed
Now that you have successfully created your very own Raised Bed from scratch, it is essential to keep on top of your gardening to ensure year-round success.
- Consistent Watering: Regularly watering your plants is essential in raised beds, as they tend to dry out much faster than in-ground beds. Make sure to water deep into the soil to ensure all roots are covered. It may be helpful to fit a Drip Irrigation System for easy convenience, removing it during the Winter seasons to avoid freezing.
- Don't Overcrowd Your Plants: Although it may be tempting to keep planting as much as possible, overcrowding can reduce airflow and increase the risk of disease.
- Plan For The Colder Months: Though not necessary, it may be useful to cover your beds during the Winter season with Frost Protection Sheets. For a simpler alternative, Tarpaulin will also help keep your soil dry and assist in warming your soil for the Spring season.
- Check Your Bed For Issues: Checking your bed regularly is essential to spot any rotting or loose screws. Maintain your bed as necessary to help extend its durability and lifespan.
Learning how to make a Raised Bed for Gardening is one of the most rewarding diy garden projects you can complete. With excellent water drainage and improved soil quality, your garden will begin to thrive. For more information on your dream garden, contact us today for valued assistance - we are happy to help.